/ post /
Minecraft Build Hacks: Pro Techniques for Better Structures
Minecraft Build Hacks: Create Better Structures Today
Build hacks are legitimate techniques that transform ordinary structures into professional-looking creations. Whether you’re building a cozy cottage, medieval castle, or modern base, these proven methods elevate your construction skills immediately.
This comprehensive guide covers the build hacks experienced players use to create stunning structures you’ll be proud to call home.
What Are Minecraft Build Hacks?
Build hacks are practical techniques and design principles that make building easier and results look better. They’re not exploits or cheats — they’re recognized building methods used by successful builders worldwide.
Why Use Build Hacks?
- Save time building more efficiently
- Avoid common beginner mistakes
- Create professional-looking results quickly
- Understand design principles behind great builds
- Replicate techniques used by expert builders
1. Corner Detailing
Corners make or break a build’s visual appeal. Flat 2D corners look amateur; detailed 3D corners look professional.
The Problem with Flat Corners
Simple vertical corners lack depth and don’t catch light realistically. They make even well-built structures look incomplete.
Three-Dimensional Corner Technique
The Method:
- Instead of straight vertical corners, offset blocks outward
- Add trim pieces extending from the main wall
- Use varied block types at corners
- Create depth with stacked materials
Step-by-Step Example (Stone Cottage):
- Build main wall with stone bricks
- Place stone brick stairs at the corner, facing outward
- Add dark oak trim trim blocks in front
- Stack another layer offset by half a block
- Extend a half-block lip outward at top
Result: Your corner catches light differently, creates shadow lines, and appears architectural rather than flat.
Corner Variations
Simple Corner:
- Single offset block
- Minimal material investment
- Still looks vastly better than flat
Complex Corner:
- Multiple stacked offsets
- Varying materials (3-4 different blocks)
- Professional appearance
- Time-intensive but stunning result
Rustic Corner:
- Intentional imperfections
- Irregular block placement
- Weathered appearance
- Great for fantasy/medieval builds
2. Roofing Techniques
The roof is often the first thing people notice about a build. Proper roofing technique is essential for professional appearance.
Why Roofing Matters
Poor roofs make great buildings look cheap. Professional roofs are the difference between a build that looks abandoned and one that looks inhabited and cared-for.
Fundamental Roofing Methods
Angled Roofs Using Stairs:
- Stairs are symmetrical and look professional
- Place stairs diagonally for perfect 45° angles
- Layer multiple stairs for steeper roofs
- Add trim at edges for finished appearance
Roof Peak Construction:
- Build walls to desired height
- Place stairs starting at wall height, angling inward
- Stack stairs progressively higher toward center
- Add a ridge line (raised blocks) at peak
- Mirror on opposite side for symmetry
Inverse Stair Combinations:
- Place stairs facing opposite directions for variety
- Creates unique angles and patterns
- Add visual interest to simple roof lines
- Experiment with different stair types
Roofing Variations
Pitched Roof:
- Classic gabled style
- Works with most building types
- Requires centered ridge line
Flat Roof:
- Modern aesthetic
- Use slabs for subtle edge detail
- Add decorative trim for interest
Mansard Roof:
- Two different angle slopes
- More complex but very professional
- Common in Victorian and French architecture
Gambrel Roof:
- Curved appearance using varied angles
- Great for barns and cottages
- Requires planning before building
Pro Tip: Roof Overhangs
Roofs should extend 1-2 blocks beyond walls. This creates:
- Proportional balance
- Shadow lines that define the building
- Realistic protection from rain
- Architectural finished appearance
3. Interior Design Hacks
Interior details separate memorable builds from forgettable ones. Professional interiors make spaces feel lived-in and functional.
Essential Room Elements
Kitchen Area:
- Furnace (for cooking)
- Crafting table (for crafting)
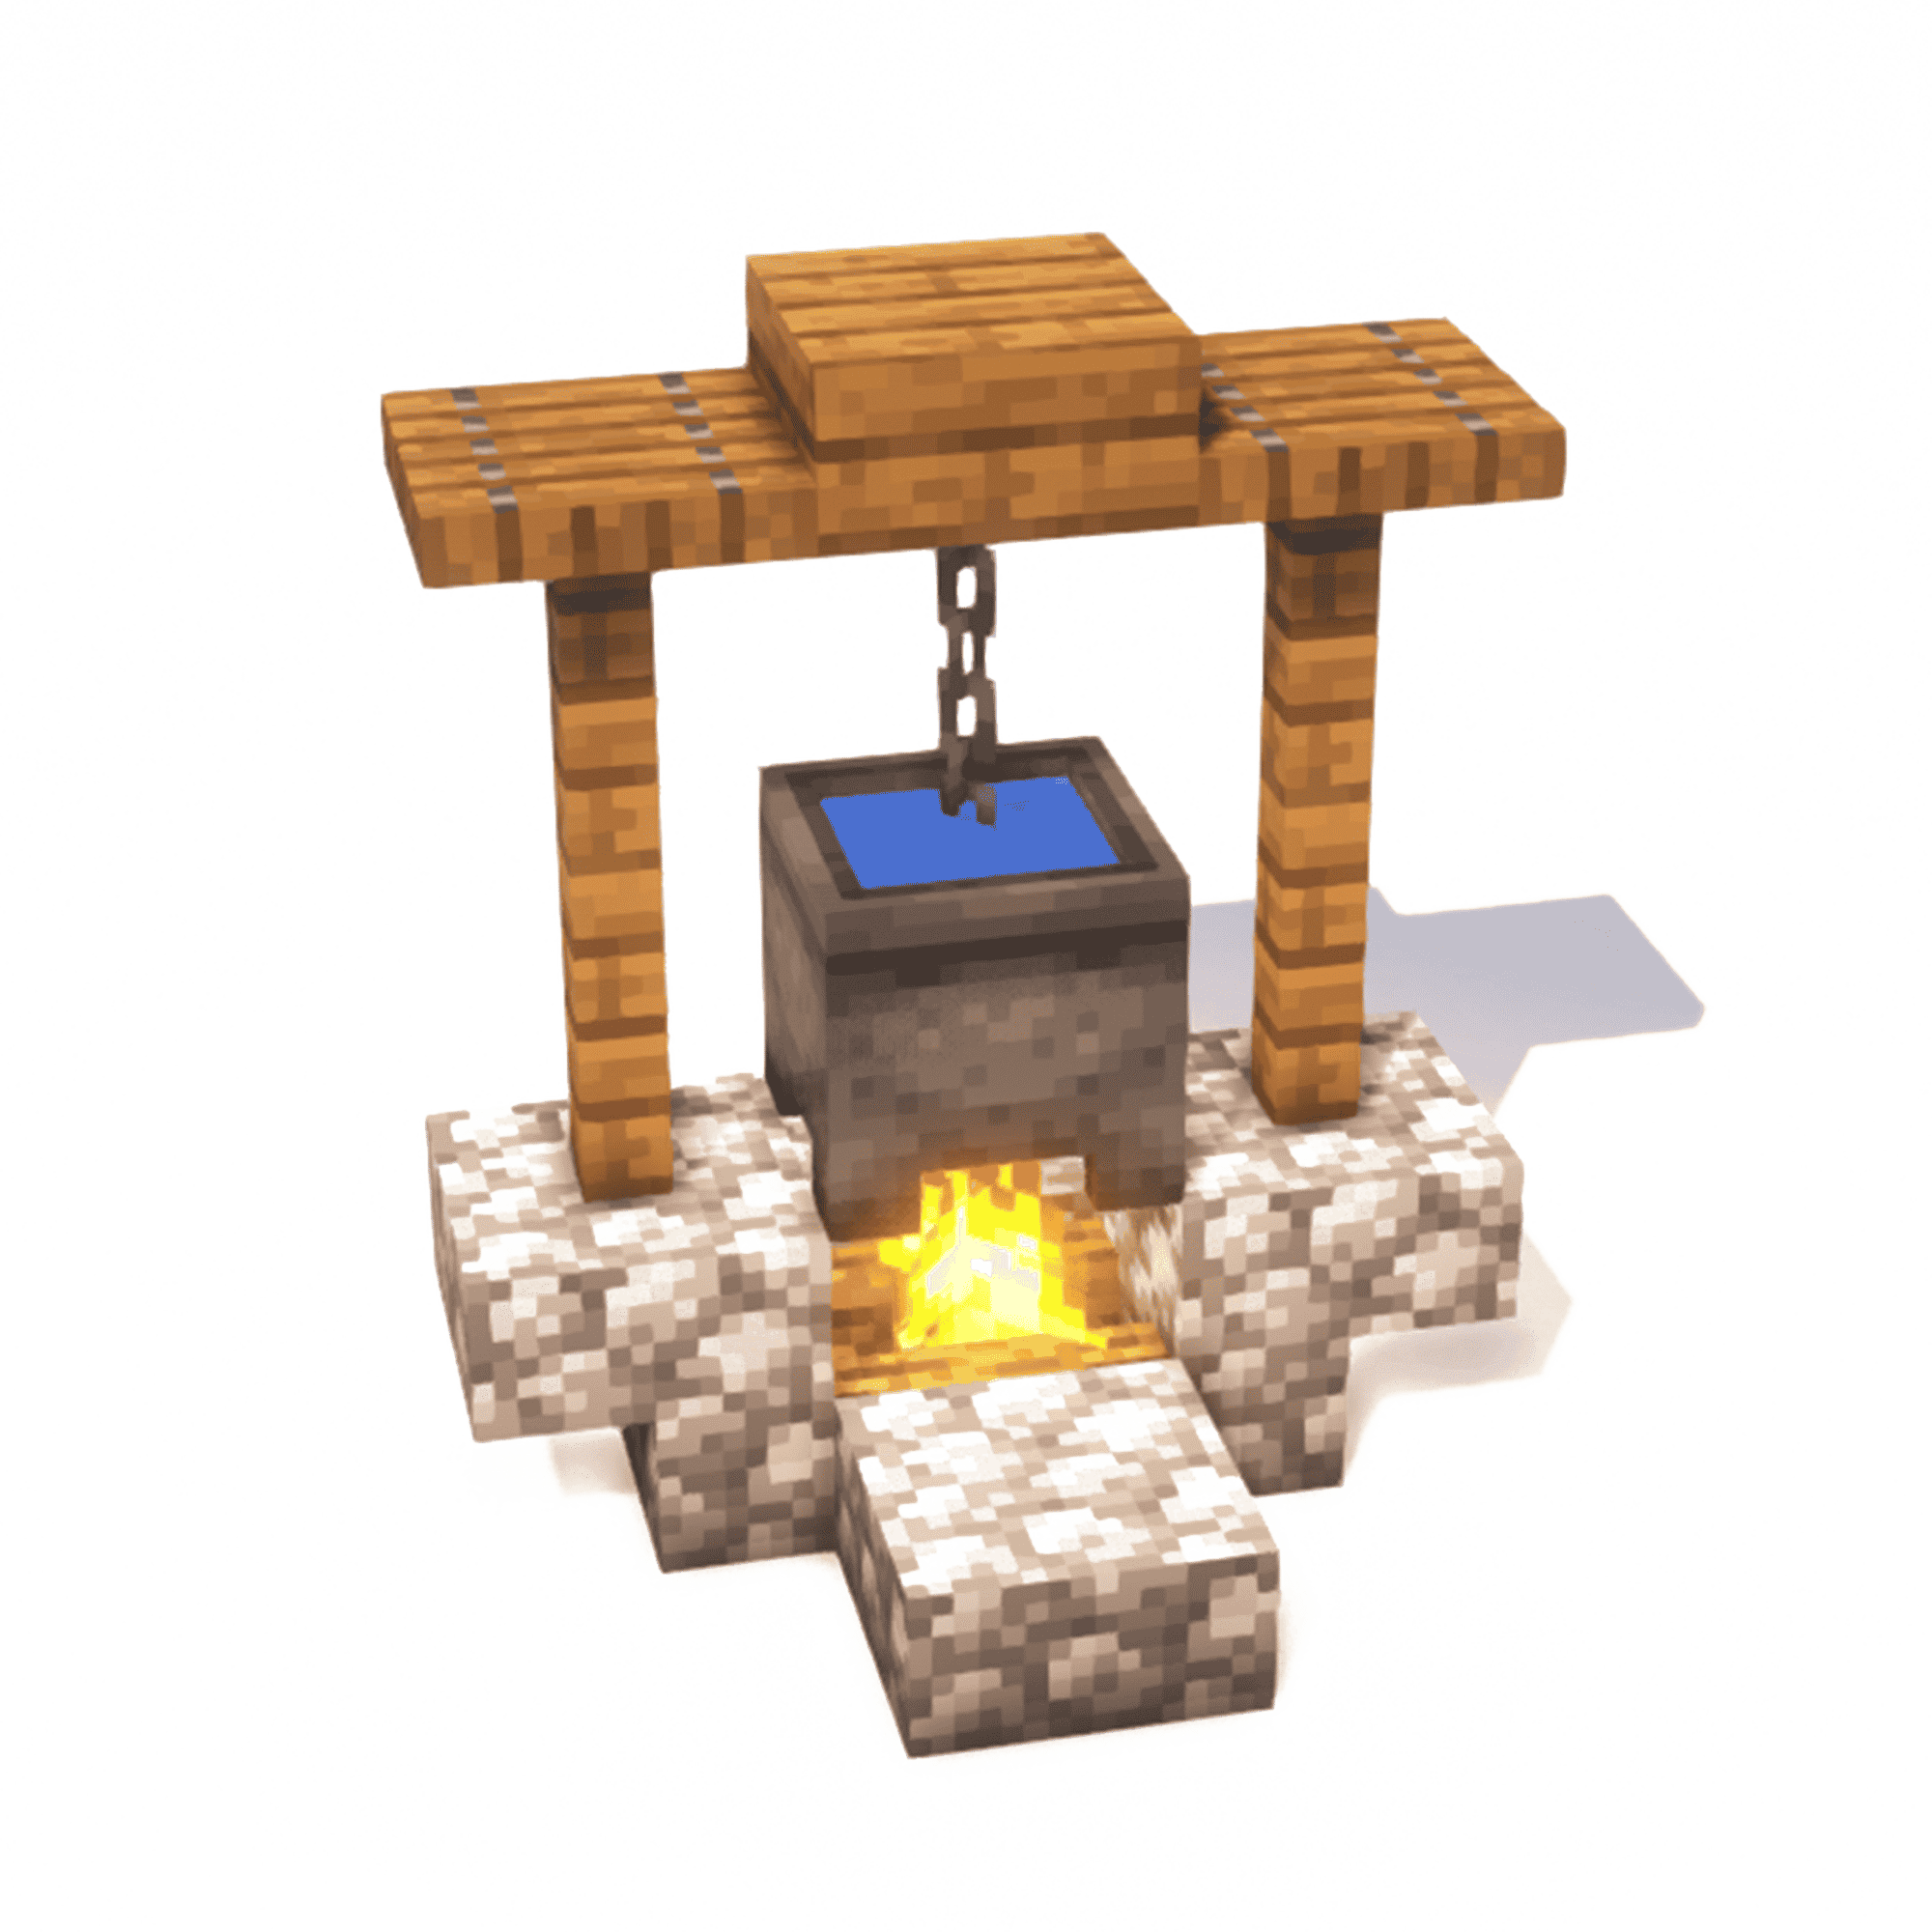
- Cauldron (alternative to furnace)
- Storage chests or barrels
- Food storage area
Bedroom:
- Bed (essential)
- Nightstands (using trapdoors and fence posts)
- Chests for storage
- Decorative furniture
- Window for natural light
Bathroom:
- Toilet (stairs or cauldron)
- Shower (glass enclosure with water elevator)
- Sink (lectern or cauldron)
- Bathtub (various designs possible)
Living/Dining Area:
- Seating (stairs, slabs, or custom chairs)
- Dining table (fences with carpet)
- Fireplace (campfire or magma block)
- Decorative furniture
Custom Furniture Guide
DIY Toilet:
- Place stairs in corner facing opposite directions
- Creates realistic toilet appearance
- Add cauldron behind as tank
- Place carpet in front as mat
DIY Sink:
- Lectern with fence gate on top
- Or use cauldron in corner with fence post
- Add faucet using chains or copper wire
- Place water bucket above for effect
DIY Shower:
- Build glass enclosure
- Water elevator in ceiling
- Push water down through cauldrons and chains
- Trapdoor for enclosure door
DIY Bed Nightstand:
- Fence post on each side of bed
- Top with stone slab
- Add lantern on top
- Place picture frame with art
DIY Dining Chair:
- Stair block facing forward
- Fence post as back (behind player)
- Carpet on stairs for comfort
- Creates functional seating
Lighting for Ambiance
Interior lighting dramatically affects room feel:
Bright & Clean: Glowstone or bright lanterns
- Modern builds
- Clean, sterile appearance
- Good for functional areas
Warm & Cozy: Candles, campfires, and orange lights
- Cottages and fantasy builds
- Inviting atmosphere
- Great for bedrooms and kitchens
Dark & Moody: Minimal lighting with shadows
- Horror builds
- Dungeon themes
- Creates atmosphere but reduces functionality
Rule of Thumb: Overlight slightly in functionality areas (crafting, cooking) and keep bedrooms at medium light for ambiance.
4. Adding Depth and Texture
Flat surfaces are the enemy of great builds. Professional builders add depth to every surface.
Texturing Principles
Vary Block Types:
- Combine smooth and textured blocks
- Mix wood with stone
- Use different colors strategically
- Avoid monotonous single-block walls
Create Crevices:
- Indent walls by using half-blocks
- Place stairs facing inward
- Add grooves for architectural detail
- Creates shadow lines that define structure
Use Ledges and Overhangs:
- Extend blocks outward at different heights
- Creates horizontal banding
- Breaks up vertical monotony
- Adds architectural interest
Hollow Out Areas:
- Create alcoves in walls
- Add inset windows and doors
- Build recessed shelving
- Increases perceived depth
Practical Texture Example
Flat Wall Problem:
- Stone brick wall looks boring
- Lacks visual interest
- Appears unfinished
Enhanced Wall:
- Base wall: Stone bricks
- Add trim: 1-block-wide dark oak trim every 3 blocks
- Inset details: Indent wall by half-block between trim
- Top edge: Stone brick stairs or trim piece
- Result: Dynamic wall with depth and character
5. Landscaping and Terraforming
Your build’s surroundings are as important as the structure itself. Professional landscaping frames your build perfectly.
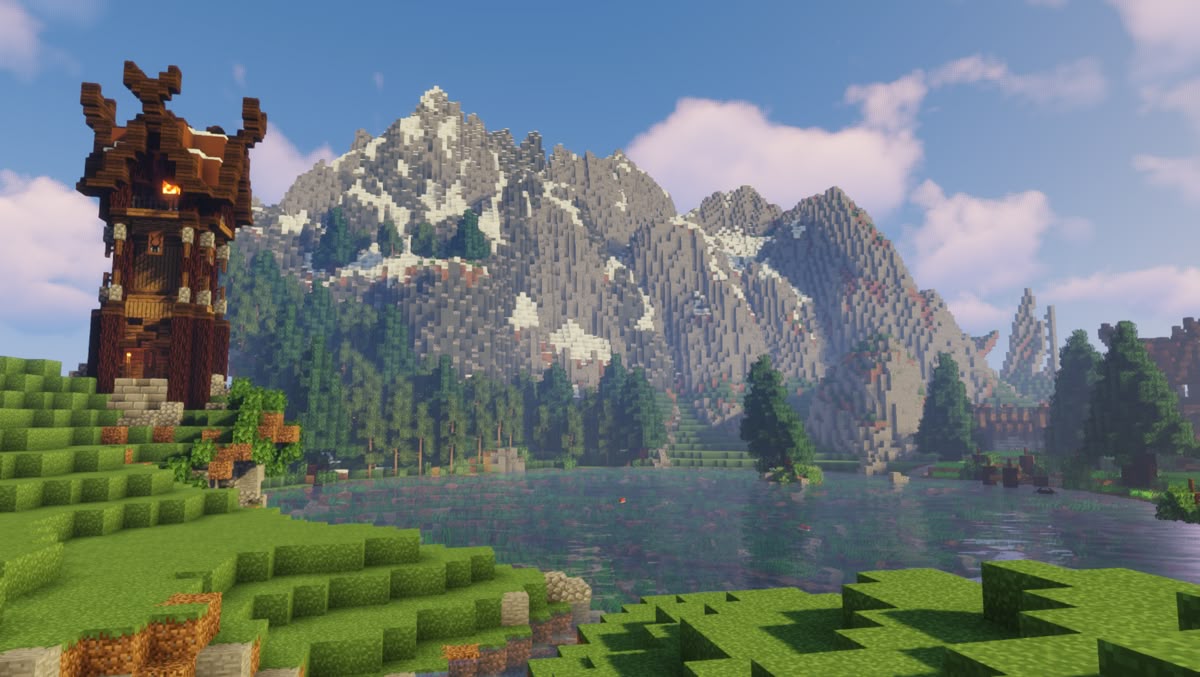
Terrain Variation
Avoid Flat Ground:
- Vary terrain height by 2-4 blocks across landscaping
- Creates natural, organic appearance
- Completely flat looks unrealistic
- Takes minimal extra effort
Retaining Walls:
- Build with varied blocks for visual interest
- Offset blocks by half using stairs and slabs
- Angle walls slightly for stability feel
- Add corner details matching main build
Terrain Blending:
- Transition from grass to dirt to stone gradually
- Use multiple grass-type blocks (grass path, moss)
- Blend biome colors naturally
- Create realistic elevation changes
Water Features
Natural Streams:
- Wind water through landscape
- Use varied depth for visual interest
- Add rocks and plants alongside
- Creates focal point and ambiance
Ponds:
- Irregular shapes look more natural
- Vary depth (2-4 blocks)
- Add lily pads and vegetation
- Frame with landscaping and plants
Waterfalls:
- Build interesting cliff face
- Let water cascade down
- Pool at bottom with continued stream
- Creates dramatic landscape feature
Vegetation Placement
Trees:
- Plant in clusters, not single trees
- Vary heights and spacing
- Create forest feeling
- Mix different wood types
Flowers and Plants:
- Scatter throughout landscape
- Use multiple types for variety
- Don’t over-plant (looks cluttered)
- Place along paths and water
Crops:
- Plant fields of wheat for agricultural feel
- Integrate farming areas into landscape
- Create intentional garden spaces
- Harvest for resources
6. Color Theory and Palette Selection
Choosing correct colors dramatically impacts your build’s visual appeal.
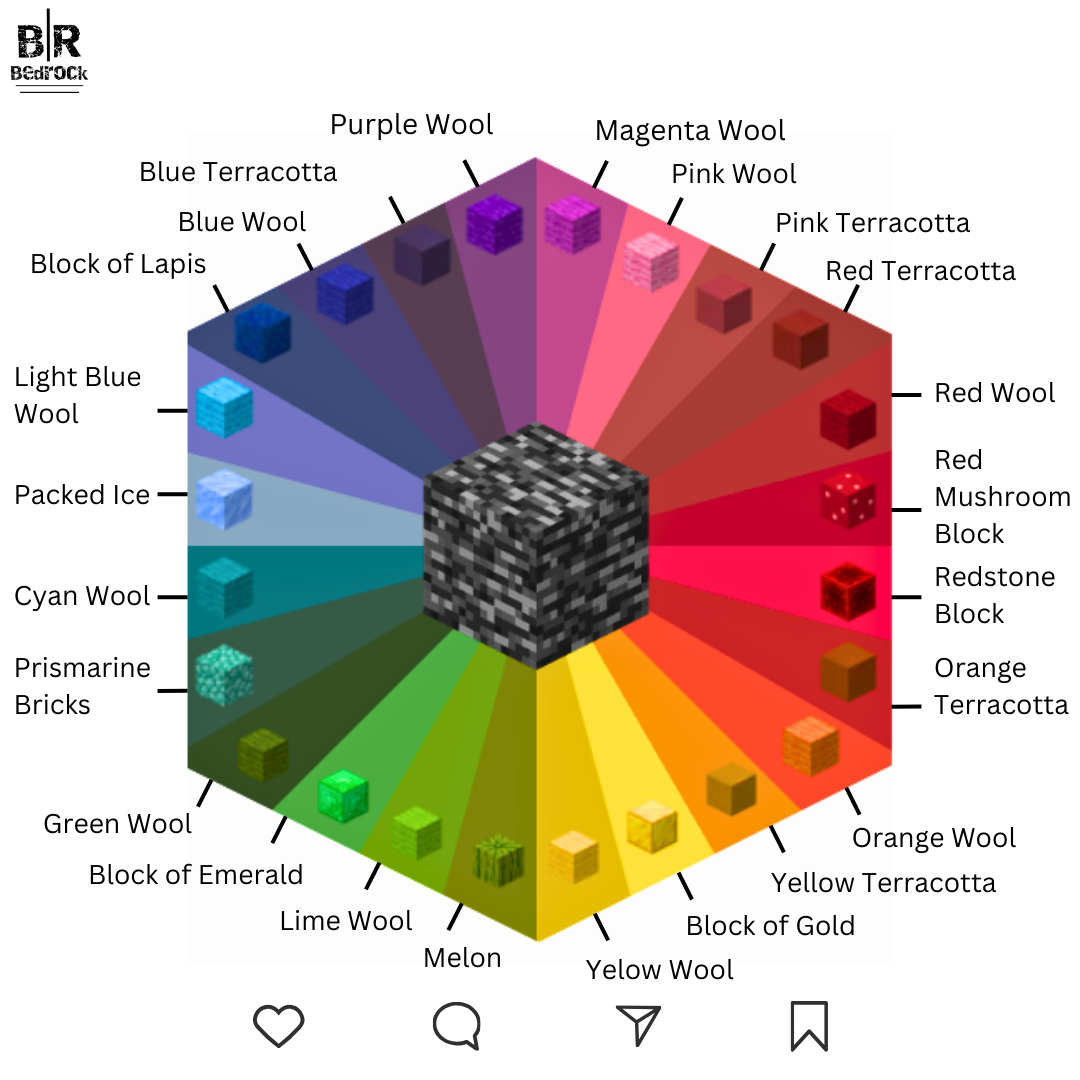
The 60-30-10 Color Rule
Primary Color (60%):
- Main building material
- Defines overall aesthetic
- Most surface area
- Examples: Oak wood, stone brick, spruce wood
Secondary Color (30%):
- Accent and contrast
- Support primary color
- Creates visual interest
- Examples: Dark oak, dark stone brick, terracotta
Tertiary Color (10%):
- Highlight details
- Draw the eye
- Decorative elements
- Examples: Gold blocks, colored concrete, contrast materials
Bedrock-Friendly Color Palettes
Cozy Cottage:
- Primary: Oak wood
- Secondary: Stone brick or stripped oak
- Accent: Orange terracotta or bone block
- Overall: Warm, inviting, homey
Modern Base:
- Primary: White or light gray concrete
- Secondary: Dark oak wood or dark gray concrete
- Accent: Cyan concrete or light blue
- Overall: Clean, minimalist, futuristic
Medieval Castle:
- Primary: Stone brick or dark prismarine
- Secondary: Dark oak or spruce wood
- Accent: Purple wool or purpur blocks
- Overall: Grand, imposing, medieval
Fantasy Cottage:
- Primary: Spruce wood
- Secondary: Dark oak or blackstone
- Accent: Purple wool or amethyst blocks
- Overall: Magical, whimsical, enchanted
Industrial Facility:
- Primary: Dark oak wood
- Secondary: Iron blocks or gray concrete
- Accent: Redstone blocks or orange concrete
- Overall: Utilitarian, functional, powerful
Color Combination Tips
Complementary Colors:
- Colors opposite on the color wheel look great together
- Orange and blue contrast nicely
- Purple and yellow create dynamic tension
- Red and cyan feel modern
Analogous Colors:
- Colors next to each other on color wheel
- Feel harmonious and unified
- Easier on the eyes
- Less dramatic but more cohesive
Monochromatic Palettes:
- Same color, different shades
- Very professional appearance
- Harder to pull off but rewarding
- Requires texture variation for interest
7. Scale and Proportions
Correct scaling makes buildings look intentional rather than random.
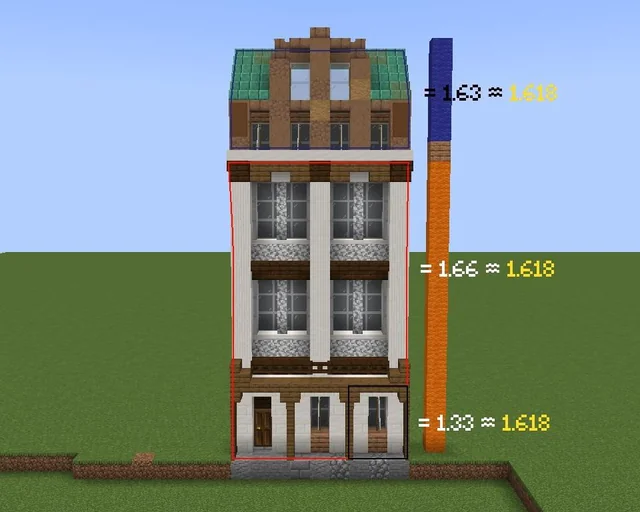
Door and Window Proportions
Doors:
- Standard height: 2 blocks tall
- Single door width: 1 block
- Double door: 2 blocks wide
- Frames add 1 block on each side
Windows:
- Standard: 2 blocks tall, 1 block wide
- Large window: 3 blocks tall, 2 blocks wide
- Vary sizes for visual interest
- Space windows 2-3 blocks apart
Roofs:
- Roof height usually 1/3 to 1/2 of wall height
- Too low looks cramped
- Too high looks unrealistic
- Adjust based on building style
Overall Building Scale
Small Building: 8x8 to 12x12 blocks
- Cottage or small house
- Fits single purpose
- Quick to build and decorate
Medium Building: 15x15 to 20x20 blocks
- Multi-room house or large cottage
- Balances detail and efficiency
- Popular for main bases
Large Building: 25x25+ blocks
- Manor house or castle wing
- Allows for grand interiors
- Time-intensive but impressive
Common Building Mistakes to Avoid
Mistake 1: Completely Flat Surfaces Every wall needs some variation, even subtle. Add corner details, trim, or texture to prevent flatness.
Mistake 2: No Roof Overhang Roofs should extend beyond walls. This creates proportion, shadow, and architectural completeness.
Mistake 3: Insufficient Lighting Dark interiors feel claustrophobic and unsafe. Properly light every interior room with 10+ light level.
Mistake 4: Wrong Building Scale Proportions matter. Doors too tall, windows too small, or ceilings too low make spaces feel wrong.
Mistake 5: Too Many Block Types Using 8+ different block types in small area creates visual chaos. Stick to 3-4 main materials per structure.
Mistake 6: Ignoring Sight Lines Consider how your build looks from different angles. Front appearance matters most, but sides and back should be intentional too.
Mistake 7: Missing Entry Details Doors and entryways deserve attention. Add porch, steps, or detailed frame to front door.
Building Workflow and Best Practices
Before Building: Planning
- Sketch your design on paper first
- List required materials to gather
- Choose color palette and block types
- Plan interior layout before walls
- Determine roof style early
During Building: Execution
- Build structure outline first (rough walls)
- Add interior elements (rooms, furniture)
- Refine exterior details (trim, corners, features)
- Add roofing last (allows easy interior access)
- Landscape around build final
After Building: Polishing
- Step back and view from distance
- Check proportions and alignment
- Add lighting as needed
- Include decorative details (paintings, items)
- Landscape surroundings to frame build
Quick Reference: Common Build Mistakes and Fixes
| Problem | Cause | Solution |
|---|---|---|
| Looks boring | Flat surfaces | Add trim, corners, texture |
| Feels unfinished | No roof overhang | Extend roof 1-2 blocks |
| Too dark | Insufficient lighting | Add lanterns, glowstone |
| Awkward proportions | Wrong scale | Adjust door/window sizes |
| Looks empty | No interior detail | Add furniture and items |
| Boring landscape | Flat ground | Vary terrain height 2-4 blocks |
| Washed out | Poor color palette | Add secondary and accent colors |
The Beginner to Pro Building Progression
Beginner Builds (First Week)
- Simple cottage with basic roof
- Rectangular structure, minimal detail
- Interior crafting area
- Basic landscaping
Intermediate Builds (Week 2-3)
- Varied roofline with multiple peaks
- Detailed corners and trim
- Multi-room interior with furniture
- Landscaped yard with garden
Advanced Builds (Week 4+)
- Complex roofing (mansard, gambrel styles)
- Intricate interior design
- Integrated terraforming
- Cohesive landscape and build aesthetic
Expert Builds (Month+)
- Multiple connected structures
- Thematic consistency across complex
- Advanced terraforming integration
- Professional level detail throughout
Conclusion
Minecraft build hacks transform ordinary structures into buildings you’ll genuinely enjoy living in. These techniques aren’t complicated — they’re simply proven methods that experienced builders use consistently.
Start with corner detailing and roofing techniques on your next build. In your second project, add interior furniture design. By your third build, you’ll naturally incorporate texturing and color theory.
The beautiful part? Each hack builds on previous knowledge, making you progressively better without overwhelming effort.
Your Next Build: Apply just one hack from this guide to your current or next build. Add corner details to your cottage, or create a custom toilet in your bathroom. Small improvements compound into exceptional buildings.
Build Hack Checklist for Your Next Project:
- Plan color palette (60-30-10 rule)
- Add 3D corner details
- Design roof with overhang
- Place interior furniture
- Add wall texture and depth
- Light all interior spaces
- Vary landscape height
- Frame build with landscaping
- Step back and admire your work!